
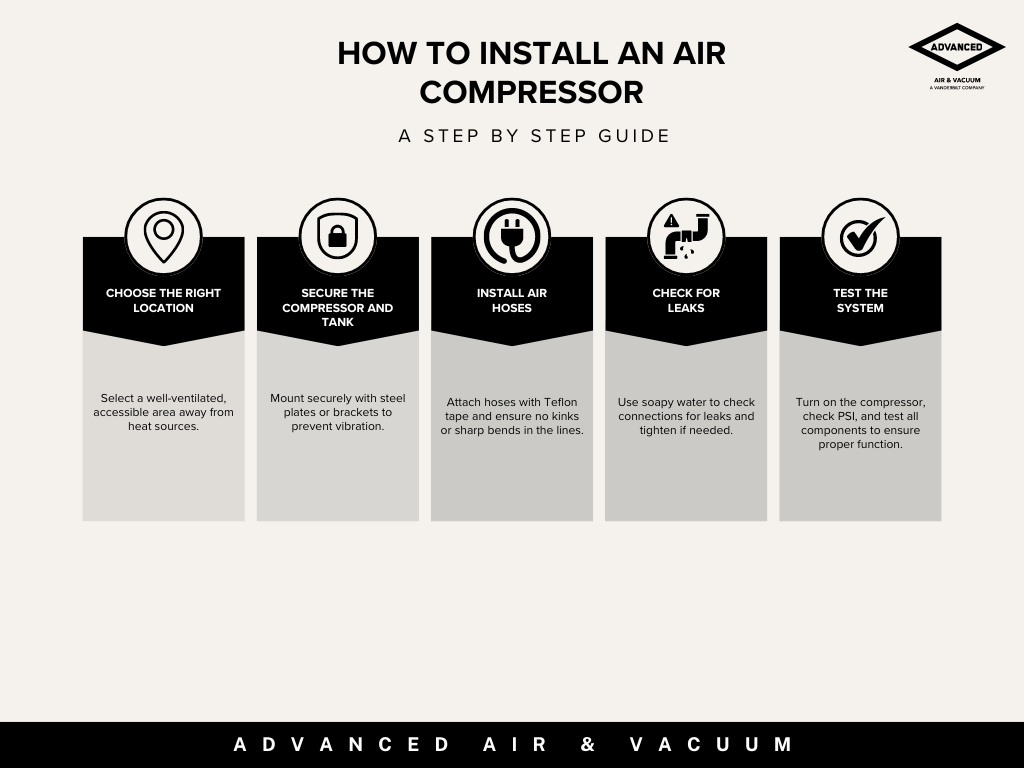
The Short Answer: To install an air compressor, choose a well-ventilated location away from heat sources and secure the compressor to prevent vibrations. Wire it to a dedicated outlet with proper grounding and circuit protection. Attach air hoses with Teflon tape for airtight seals, ensuring they’re routed without kinks. Check for leaks using soapy water and tighten connections as needed. Finally, turn on the compressor, monitor the pressure gauge, and test tools to ensure everything operates correctly. Following these steps ensures a safe and effective setup.
Are you curious about how to install an air compressor? You’ve probably encountered them before, whether in a mechanic’s shop or in a garage, but the installation process may seem overwhelming. Don’t worry! This guide breaks it down step by step. Let’s get started.
Installation Process for Your Air Compressor
Step 1: Choose the Right Location
Selecting the right location for your air compressor is crucial for optimal performance and safety. Start by ensuring the area is well-ventilated, as good airflow prevents overheating during prolonged use. Look for a space with windows or vents to facilitate air circulation. It’s also important to keep the compressor away from heat sources, such as furnaces or direct sunlight, to avoid excessive heat that can negatively impact efficiency and lifespan.
When deciding on a location, consider accessibility. You’ll want to choose a spot that allows easy access for maintenance and inspections, enabling you to perform regular checks and replace filters without moving other equipment. Additionally, think about noise levels; position the compressor away from living areas or workspaces where the sound could be disruptive. Finally, ensure that your chosen location is near a dedicated electrical outlet to avoid the hazards of long, unsafe extension cords.
- Ventilation: Ensure the area is well-ventilated to prevent overheating.
- Distance from Heat Sources: Avoid placing the compressor near heat sources like furnaces or direct sunlight.
- Accessibility: Choose a location that allows easy access for maintenance and inspections.
- Noise Consideration: Position the compressor away from living spaces to reduce noise disruption.
- Proximity to Power: Ensure the location is near a dedicated electrical outlet.
Step 2: Secure the Compressor and Tank
Properly securing the compressor and tank is essential for safe and efficient operation. Start by using a level to ensure the compressor is evenly positioned; an unlevel compressor can lead to excessive vibrations, causing wear and potential mechanical failure. If your compressor is particularly large or heavy, consider reinforcing the mounting surface with additional support to handle vibrations effectively.
To further minimize vibrations and noise, place rubber pads or mounts underneath the compressor. This not only enhances comfort in your workspace but also protects the equipment from wear caused by constant movement. Additionally, it’s vital to maintain adequate clearance around the compressor—at least 12-18 inches—to allow for proper airflow and easy access for maintenance tasks, such as changing air filters.
- Level Installation: Use a level to ensure the compressor is evenly positioned.
- Vibration Dampening: Consider using rubber pads or mounts to minimize vibrations.
- Reinforcement: Reinforce the mounting surface to handle vibrations effectively.
- Clearance: Maintain at least 12-18 inches of space around the compressor for airflow.
Step 3: Connect the Electrical System
Making proper electrical connections is critical for the safe operation of your air compressor. Begin by wiring the compressor to a dedicated electrical outlet that meets its power requirements. Use the recommended wire gauge specified in the owner’s manual to prevent overheating and ensure safe operation. If you’re unsure about wiring, consult a licensed electrician to handle this step.
Next, install a fuse or circuit breaker rated for the compressor’s amperage to protect against overloads and short circuits. This safety measure is essential to prevent electrical fires. Additionally, ensure the compressor is properly grounded according to local electrical codes. This grounding reduces the risk of electrical shocks and enhances overall safety. Lastly, place the on/off switch in a convenient location that is easy to reach during operation, ensuring quick access in emergencies.
- Wire Gauge: Use the recommended wire gauge based on the compressor’s power requirements.
- Circuit Protection: Install a fuse or circuit breaker to prevent overloads.
- Grounding: Ensure the compressor is properly grounded.
- Switch Location: Place the on/off switch in an easily accessible location.
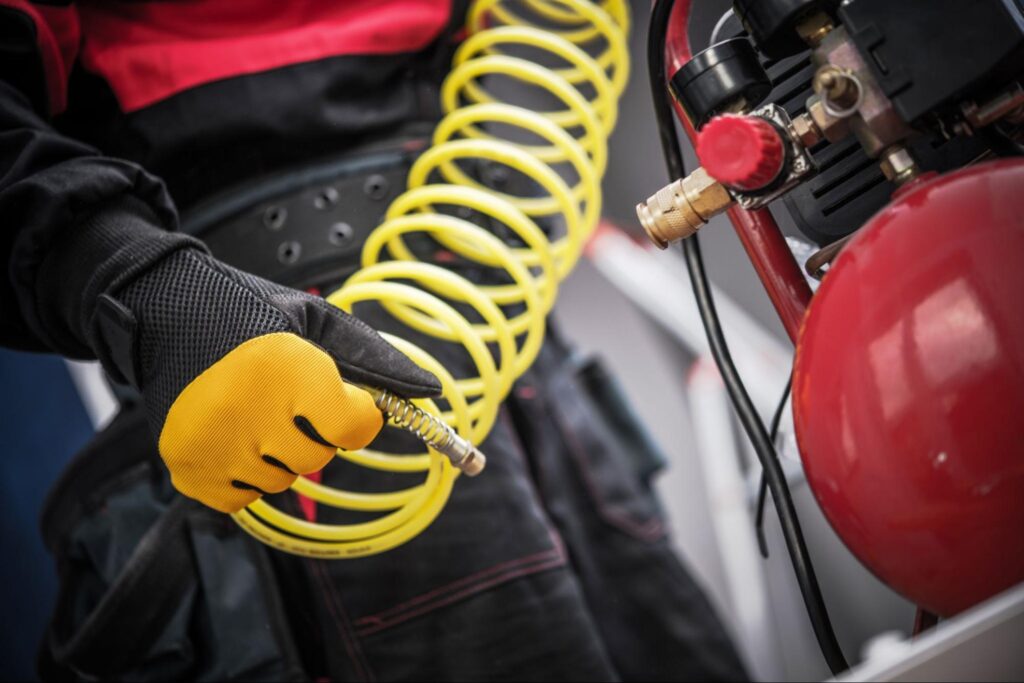
Step 4: Install the Air Hoses and Lines
Connecting the air hoses and lines correctly is vital for efficient operation. Start by using Teflon tape on all threaded connections to create airtight seals that prevent air leaks. These leaks can reduce the compressor’s efficiency and impact the performance of connected tools. Tighten connections securely but avoid overtightening, which can damage fittings.
Plan the route for your air hoses carefully to avoid kinks and sharp bends. Smooth, straight runs help maintain optimal airflow and ensure that your tools operate effectively. To keep hoses organized and prevent tripping hazards, use cable ties or clips to secure them along walls or surfaces. Additionally, ensure the hoses are long enough to reach all necessary tools without excessive slack, as this helps maintain a tidy workspace while providing flexibility.
- Tight Seals: Use Teflon tape on all threaded connections to ensure airtight seals.
- Routing: Plan the hose route to avoid kinks and sharp bends.
- Securing Hoses: Use cable ties or clips to keep hoses organized.
- Length Consideration: Ensure hoses are long enough to reach tools without excess slack.
Step 5: Check for Leaks
Conducting a thorough leak check is essential before using the compressor. Begin by performing a soapy water test: mix soap with water and apply it to every joint and connection. If you see bubbles forming, it indicates a leak that needs to be addressed. If leaks are detected, tighten or reseal the connections as necessary to ensure efficiency and safety.
Regular leak checks should become a routine part of your maintenance schedule. This proactive approach helps catch issues early, ensuring that your compressor continues to operate efficiently and safely over time. It also helps in avoiding costly repairs due to undetected leaks.
- Soapy Water Test: Apply soapy water to connections; bubbles indicate leaks.
- Tightening Connections: Address any detected leaks by tightening or resealing.
- Regular Checks: Incorporate leak checks into your routine maintenance schedule.
Step 6: Test the System
Testing the system is crucial to ensure everything functions correctly before full use. Start by turning on the compressor and monitoring the pressure gauge. Make sure it reaches the correct PSI for your intended applications, as this is vital for safe and efficient operation.
Next, perform a functionality test by running all connected tools and equipment. This confirms that they operate correctly and that the compressor can handle the load. Pay attention to any unusual noises during operation; strange sounds can indicate mechanical issues that need immediate attention. Lastly, check for excessive vibrations—if the compressor shakes too much, it may need to be re-secured or adjusted. Make any necessary adjustments to pressure settings or connections to ensure everything operates smoothly.
- Monitor Pressure Gauge: Ensure the compressor reaches the correct PSI for your applications.
- Functionality Test: Run connected tools to confirm proper operation.
- Listen for Unusual Sounds: Pay attention to strange noises that may indicate issues.
- Check for Vibrations: Observe the compressor for excessive shaking; adjust if necessary.
- Adjust Settings: Make adjustments to pressure settings and connections as needed.
Understanding Air Compressors
Before diving into installation, it’s essential to understand what an air compressor does and the various components involved.
What is an Air Compressor?
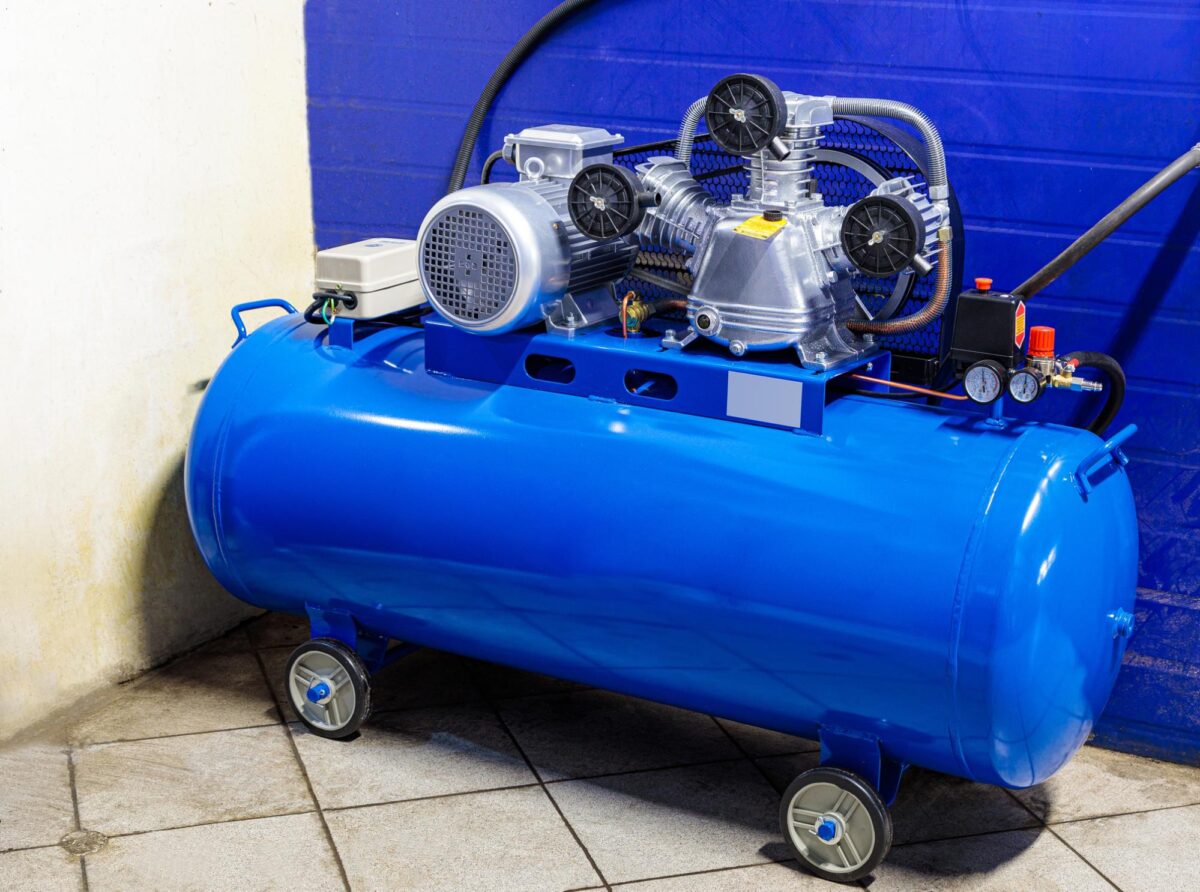
An air compressor converts power into potential energy stored in pressurized air. It powers air tools, inflates tires, and is used in many industrial applications. Air compressors come in various sizes and capabilities, from small portable units to large shop compressors.
Types of Air Compressors
- Portable Air Compressors: Ideal for home use and small jobs like inflating tires or running smaller air tools.
- Industrial Air Compressors: Larger, more powerful units typically used in workshops or industrial settings to power heavy-duty air tools.
The Key Components of an Air Compressor System
- Compressor Unit: The heart of the system, responsible for generating compressed air.
- Air Tank: Stores compressed air for later use, reducing the need for the compressor to run continuously.
- Air Hose: Channels the compressed air from the tank to the tools or systems you are operating.
- Gauge: Monitors the air pressure in the tank, typically measured in PSI (pounds per square inch).
- Solenoid Valve: Controls the flow of compressed air from the tank to the system.
- Electrical System: Powers the compressor’s electric motor, requiring connections to the battery and fuse box.
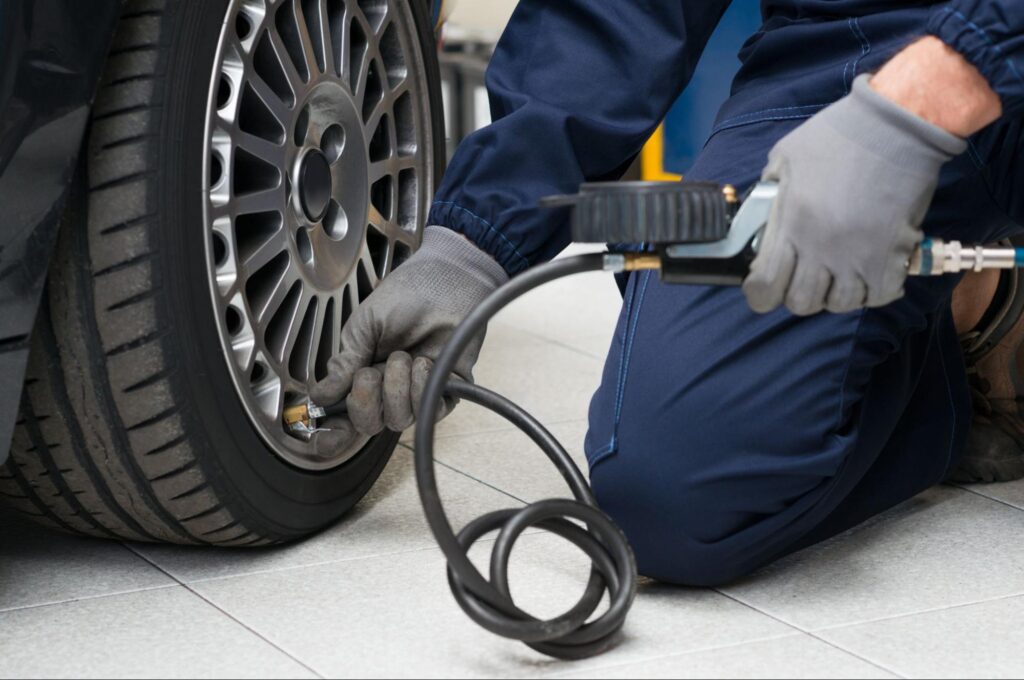
Common Air Compressor Applications
Air compressors are versatile tools used across various industries and applications. Here are some common uses:
- Automotive Industry: Air compressors power tools like impact wrenches, paint sprayers, and lifts in repair shops and tire shops.
- Car Washes: Compressors supply air to cleaning equipment and drying systems for efficient car washing.
- Sandblasting: Compressors deliver the high-pressure air needed for effective sandblasting in both industrial and home applications.
- CNC Machines: Compressed air is used for cooling, cleaning, and operating pneumatic components in CNC machining.
- Woodworking: Air compressors power pneumatic tools like nail guns, sanders, and spray finishers in woodworking shops.
- Construction: Compressors are essential for running jackhammers, drills, and other pneumatic tools on construction sites.
- Home Garage: Perfect for inflating tires, running air tools, and tackling DIY projects at home.

How Advanced Air & Vacuum Can Help
Does this all seem too complicated? Let us handle it for you! Contact us or give us a call at +1 619-562-3373 for expert installation support. Now that you know how to install an air compressor, choosing the right equipment is the next step. At Advanced Air & Vacuum, we offer a wide range of air compressors for every application, our experts can help you find the right fit.